

My first quilt finish for 2018 is the Magnolia Mystery Quilt from Cheryl Brickey's Meadow Mist Designs. This was a fun and very easy paced mystery quilt along! I love the finished quilt!
I started this QAL during the summer, and by November, put the small blocks together at a retreat, and guessed at how they were going look. The white, black and yellow are all Kona cotton solids. The turquoise is a 2001 fabric from an Alexander Henry line, "here, kitty kitty."


The pattern calls for lots of negative space, which in my case is white. What has been so much fun on this quilting journey is seeing the other quilts in progress, and finished on Instagram and Facebook. So many quilters made extra blocks or put borders on to break up the white space. While those quilts all look beautiful, I decided to stick with the pattern, and see how it went.

I got the top pieced by Christmas, and then there was a lull as I was trying to move my sewing things up to a bedroom. I finally got the room set up with the basics (still lots to put away on the shelves)

Pinning up this quilt was the first project in the new room. I use my craft table, and heavy duty binder clips to pull the backing flat and keep the quilt sandwich nice and taut and then I pin, pin, pin.

The backing is an organic cotton that I found on the red tag table at Joann Fabrics. Please note that my design wall is up, but somehow, very disappointingly, the tape under the flannel shows (and is not even, so can't serve any useful purpose).
 |
| I also got a wide ironing board for the sewing room! |

I had some grand plans for some fancy quilting, but suddenly it was February, and I wanted a finished quilt to submit by February 15 for the reveal parade in March. I thought that nice wavy lines would be a good contrast to the sharp edges of the blocks. After considerable pondering, I decided to go widthwise with the lines, since the pattern actually spans the width of the finished quilt.
I started in the middle with white straight lines (I use Aurifil thread) every 3 inches or so. This allows me to get rid of the pins.

My plan was to add some lines of yellow and turquoise green. Of course, I wasn't sure I had quite enough of those colors, and so had to wait for some additional thread to arrive! I didn't end up using the pale green on the front. (I did use in the bobbin!) I had enough bolder turquoise thread that I ended up using.

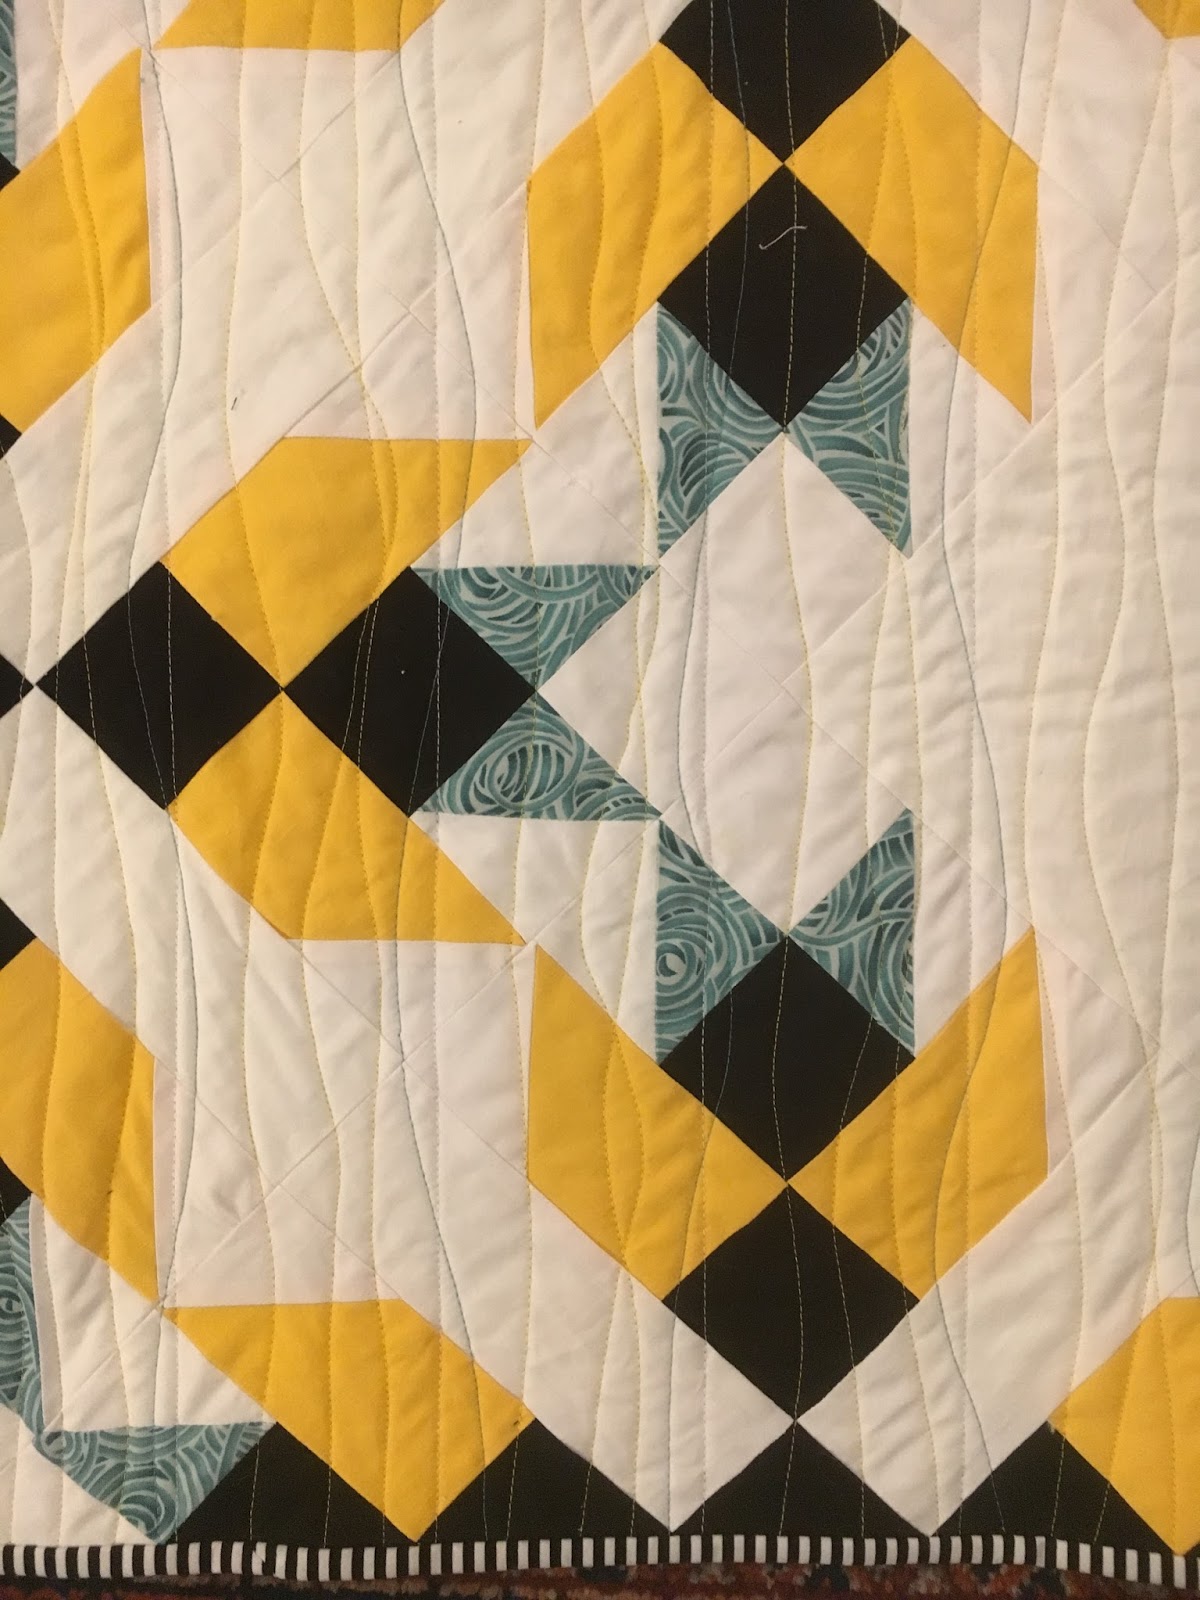
I started putting two yellow wavy lines, using my walking foot, in between the white lines, so they were approximately one inch apart. That looked a bit bare to me, so I then decided to put down a turquoise line woven in and around the white straight lines. I thought that gave just enough pop of the turquoise. That still wasn't quite right, so I went back and added another yellow line, weaving around one of the wavy yellow lines. Those four lines of color between the white finally looked right to me.

I had some black and white stripe fabric that I knew would be perfect for the binding. It was blinding to look at in one big piece, but cut up into a really nice binding strip!


Here is my view of Lake Erie from my sewing machine in the new space. How lucky am I? It will be even nicer in the summer!

When I had first finished washing and drying, my trusty quiltholder wasn't around, so I used the abundant snow as my background.

The finished quilt (after laundering) measures 60 x 68 1/2 inches. This will soon be on its way to someone special! I am thinking about putting together tutorials on the wavy quilting design and also on using the craft table and clips for making the quilt sandwiches. What do you think? As always, thanks so much for visiting my blog!
Take care,
Gretchen
This is beautiful! I love the striking nature of the blocks and your quilting is so creative.
ReplyDeleteThanks, Alison. Now I hope to get back to finish the On Ringo Lake quilt!
DeleteWell done. Mine's sandwiched and I'm pondering the quilting -- I love what you've chosen/executed here!
ReplyDeleteThank you so much! I think the wavy quilting in multiple colors is my new "go-to" quilting pattern!
DeleteThis turned out beautiful! Love the striped binding with you color combo.
ReplyDeleteThank you. I love the striped binding, as well. I've already used it on another quilt! I may have to buy some more material!
DeleteCongrats on a fabulous finish!!
ReplyDeleteThank you so much!
DeleteBeautiful quilt! I love the colors of the prints and how you used colored thread to do the quilting. It gives the negative space such a special look!
ReplyDelete