Five years ago, my niece married a wonderful guy from Great Britain. Later that summer, I happened upon this blog, which had such an adorable quilt using the Union Jack pattern. I thought that if Kim and Thomas ever had a baby, this would be a perfect quilt!
Earlier this year, I was delighted to hear that a baby was on its way, so I started thinking about this quilt. There are many very different Union Jack patterns out there. I found this you tube tutorial which in turn, directed me to a book that I was able to find at my local library.
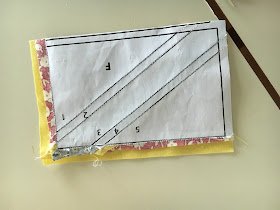
I didn't follow the pattern exactly. Like the you tube quilter, I only used the middle part (the Union Jack part), and adapted the process to cut down on the paper piecing. Instead of paper piecing the whole block, I only pieced the four corner units, then sewed then together with strips for the center cross.
I could only imagine doing this quilt in bright 30s prints. I have always loved those bright whimsical prints for children's quilts. My stash was pretty well depleted (See some older 30s print quilts here), so I ordered up a bundle of Judie Rothermel Aunt Grace fabrics and a bundle of Darling Barnyard by Kaye England, and mixed them with my remaining other pieces.
Trying to cleverly ascertain whether the expected baby was a boy or a girl, I asked my niece about her color scheme. Gender neutral - grays and whites and creams. Uh oh! While I am certain I could make a very cute baby quilt in that color scheme, I didn't want to do it for this pattern! I kept the quilt light, but used blues, yellows and reds, which in my mind are gender neutral!
I began putting together the blocks, and chose a blue, yellow and red solid to use for the narrow strips. I created one block at a time, and had to be careful when there was a clearly directional pattern.
 |
| Chain piecing the four units needed for each block. I used the light table to help with the fabric placement. |
I learned from working on my New York Beauty blocks that it speeds up the process to remove the paper just from the seams before sewing pieces together. I have also found that the pieces hold their shapes better if some of the paper is left on while putting units together.
 |
| One down, three more to go! |
 |
| Adding the middle strip |
After I finished the first three blocks, I took a look at them, and realized that my yellow solid was really the wrong shade of yellow - a bit too orangey. No problem - I ended up using the yardage in my Eye Candy Quilt. Once I fixed the yellow solid, I started making more blocks.
 |
| The orangey-yellow is on the lower left. |
I had purchased a Moda Essential dots - creamy white with small red dots to use as sashing to keep the top light and airy looking. After laying it out, it needed a little something more, and so added a white and red fabric from the Aunt Grace bundle

 |
| The sashing with the added little blocks. |
 |
| Check out these adorable little fabrics! |
The finished quilt was 42 inches wide and 48 inches long, but shrunk a tad when washed and dried. (And I promise I washed it after draping it on the beach logs for those artsy quilt shots at the beginning of the blog!)
 |
| My trusty quilt holder at work!. |
Keeping in mind that I had totally ignored their preferred color scheme, I backed the quilt in a cream and gray fabric.

The baby is here, and is a beautiful little girl! Welcome to the world, baby Pippa!
Love,
Aunt Gretchen


What a wonderful baby quilt for little Pippa - congratulations!!
ReplyDeleteIt's just beautiful and the finished quilt shows how much thought went into the color selection and placement. Well done!
ReplyDelete